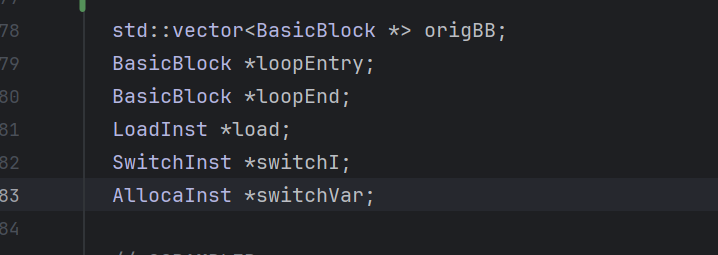
LLVM14下的ollvm编译 【清羽】Windows10下编译OLLVM-14.x_ollvm 编译优化后-CSDN博客
参考这位大佬的文章
最终效果 原版ollvm的混淆效果
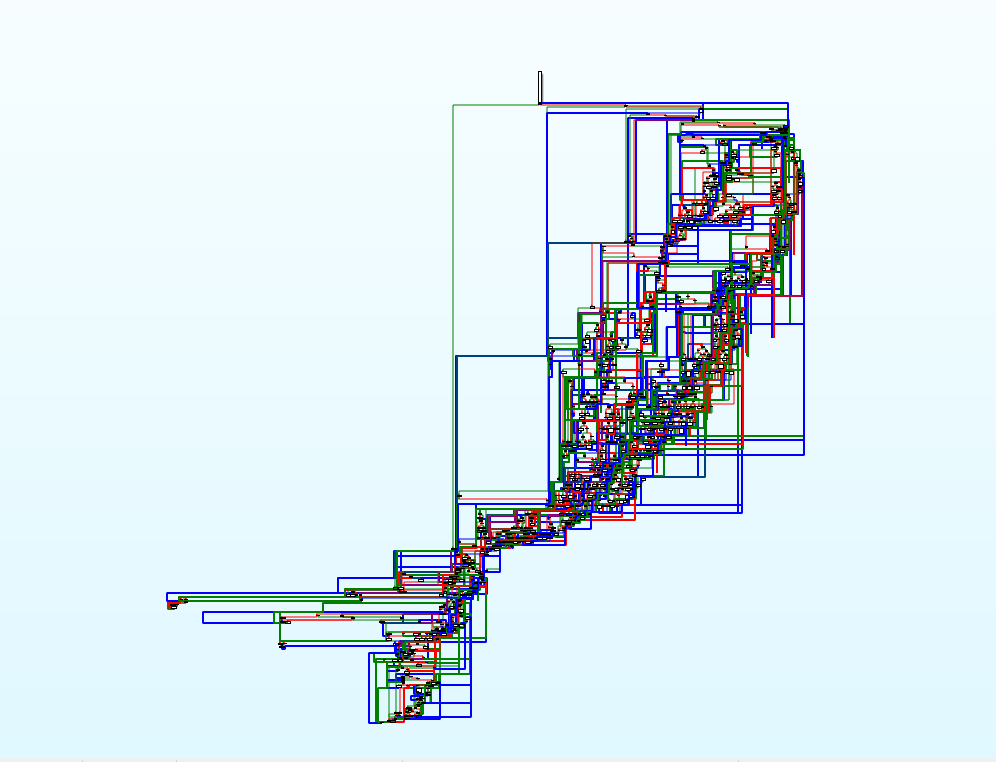
魔改后的
d810无法生效
一些更复杂的例子
普通fla流程分析 1 2 set (OLLVM "-mllvm -fla -mllvm -split -mllvm -split_num=3" )add_definitions (${OLLVM} )
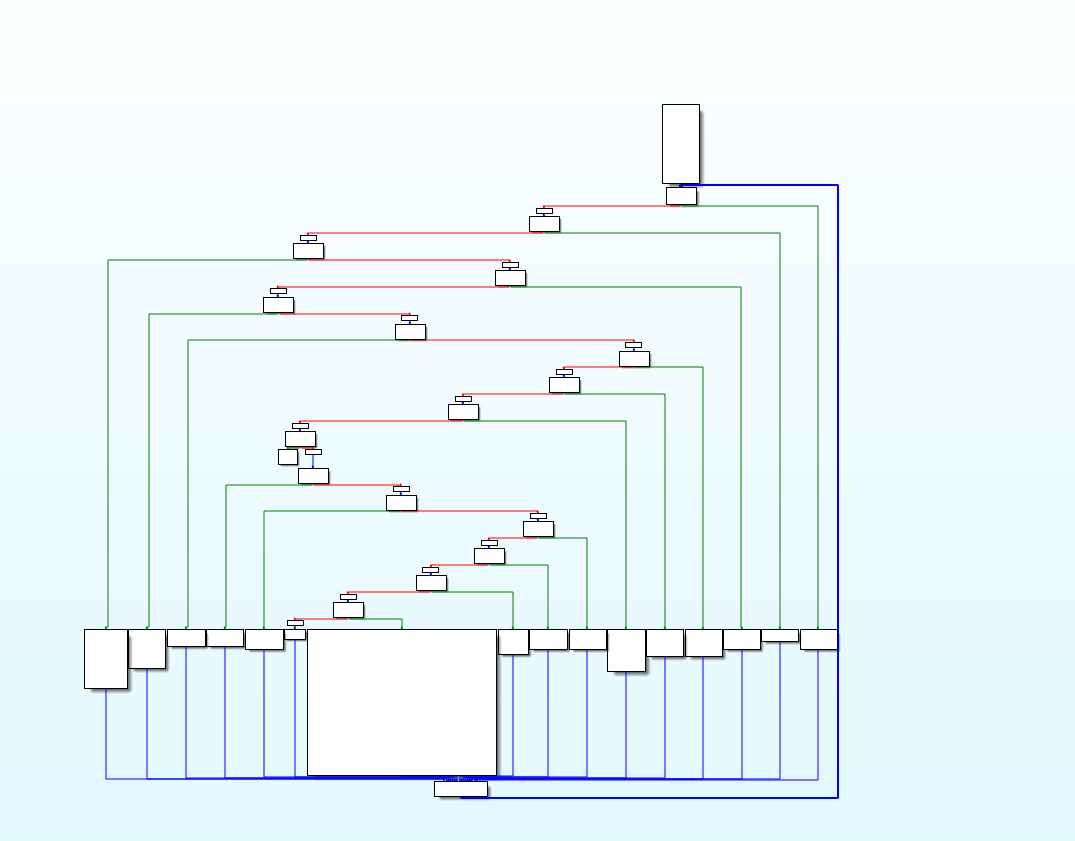
我们先从一个普通的fla样本开始分析,并思考可能的魔改思路
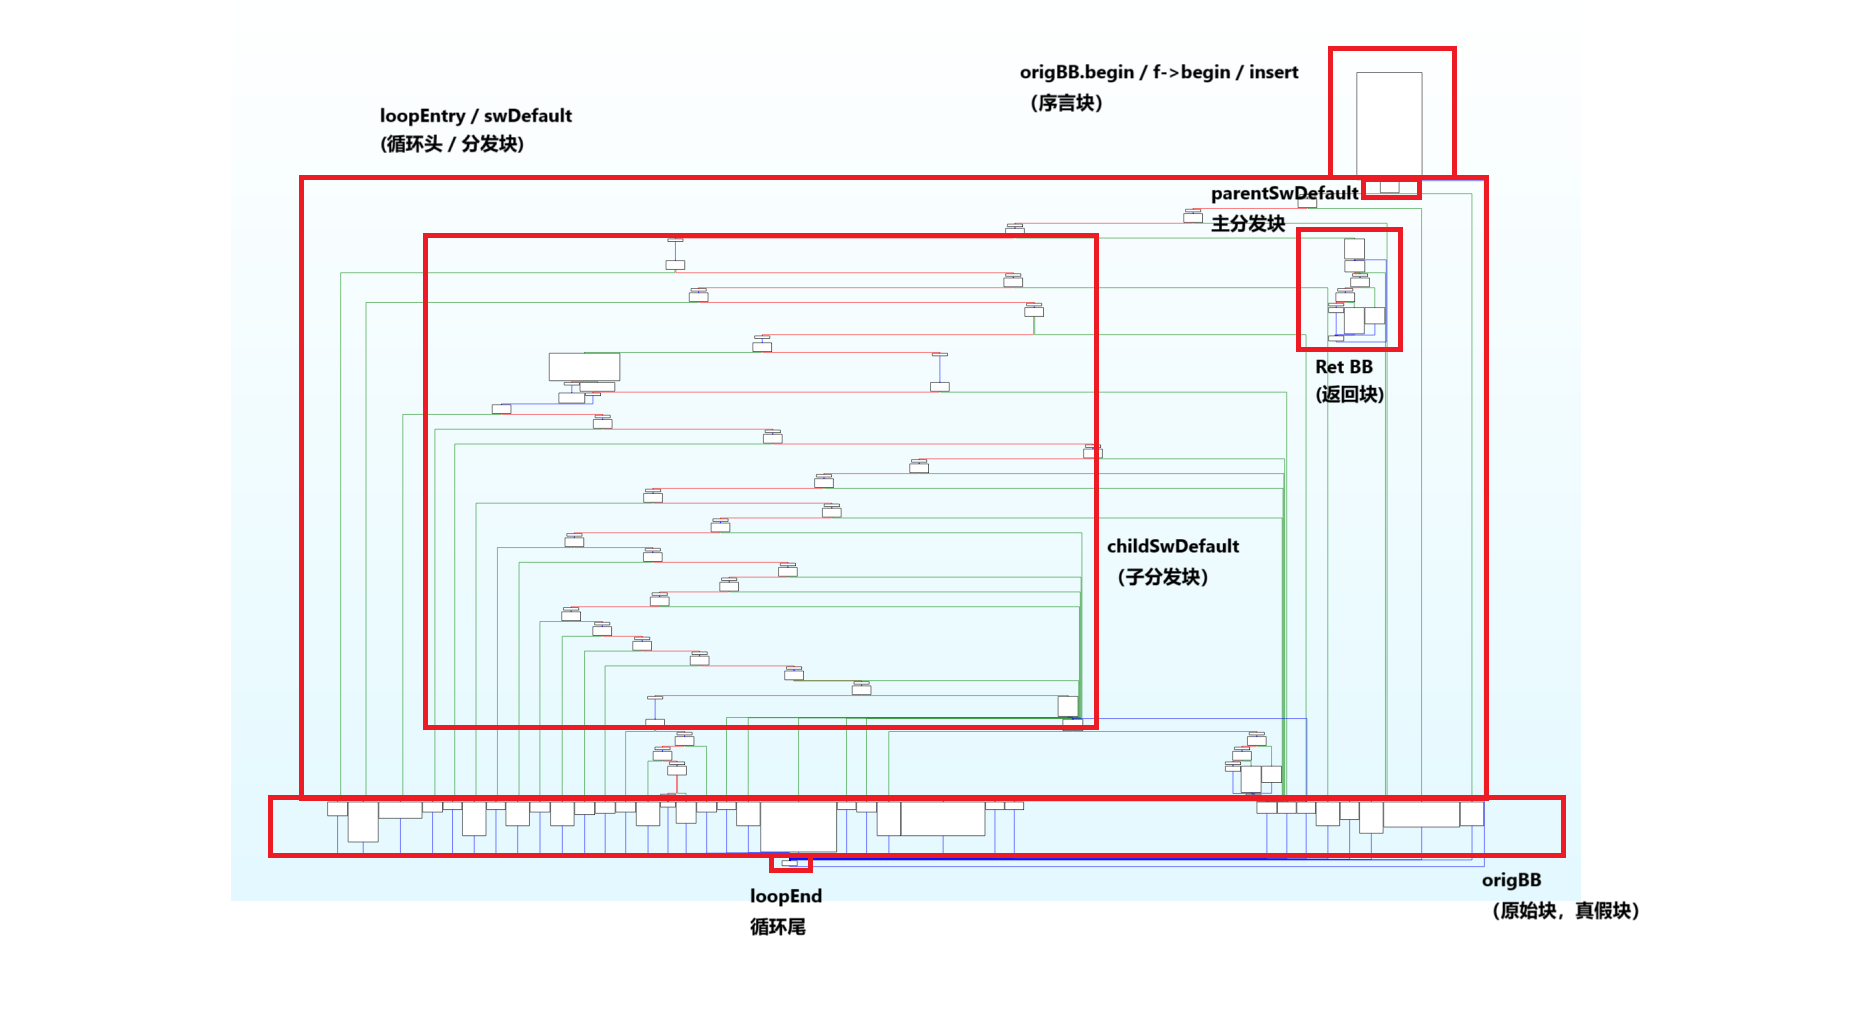
图片中各个块的名称,我都尽量使用ollvm的源码中的变量名,以便后续更方便地阅读和修改代码
流程大概就是,函数从insert块开始,然后进入loopEntry块开始匹配numCase,接着进入到相应的origBB块
在每个origBB块的结尾,都会给switchVar赋一个新的numCase,然后跳转到loopEnd块
loopEnd再跳回loopEntry块中的parentSwDefault块中,在这里,switchVar的值赋给了LoadSwitchVar
然后每一个childSwDefault块,都是对LoadSwitchVar进行匹配,再进行跳转。
魔改思路 思考一下我们在进行ollvm去混淆的时候,核心是什么?是寻找所有的origBB块
那么我们又是怎么去寻找origBB块的呢?一般而言,就是去判断当前块的后继,是否为loopEnd块
像普通的ollvm案例,我们只需做一个简单的判断就可以了
那如果我们每个origBB的后继不是loopEnd块,也就是说不单止跳转到parentSwDefault块,也随机跳转到里面的childSwDefault块呢
那么简单地通过后继寻找orignBB就不可行了
idapython直接修改尝试与问题思考 代码 我们先用idapython尝试一下效果
1 2 3 4 5 6 7 8 9 10 11 12 13 14 15 16 17 18 19 20 21 22 23 24 25 26 27 28 29 30 31 32 33 34 35 36 37 38 39 40 41 42 43 44 45 46 47 48 49 50 51 52 53 54 55 56 57 58 59 60 61 62 63 64 65 66 67 68 69 70 71 72 73 74 75 76 77 78 79 80 81 82 83 84 85 86 87 88 89 90 91 92 93 94 95 96 97 98 99 100 101 102 103 104 105 106 107 108 109 110 111 112 113 114 115 116 117 118 119 120 121 122 123 124 125 126 127 128 129 130 131 132 133 134 135 136 137 138 139 140 141 142 143 144 145 146 147 148 149 150 151 152 153 154 155 156 157 import randomrandom.seed(1919810 ) class BLOCK : def __init__ (self, block, addr ): self .block = block self .addr = addr self .successors = [] self .branchType = None def print_state (self ): print (f"addr {self.addr:x} => " , end='' ) if (self .branchType != None ): print (f" {self.branchType} " , end=" " ) for succ in self .successors: print (f"{succ:x} " , end=" " ) print () base = 0x400000 REAL_BLOCKS = {} DISPATCH_BLOCKS = {} def get_jmp_block (blocks ): successors = {} successors_block = {} for block in blocks: succ_blocks = list (block.succs()) if (len (succ_blocks) == 1 ): if (succ_blocks[0 ].start_ea not in successors): successors[succ_blocks[0 ].start_ea] = 1 successors_block[succ_blocks[0 ].start_ea] = succ_blocks[0 ] else : successors[succ_blocks[0 ].start_ea] += 1 for key in successors: print (hex (key), successors[key]) max_successors_addr = max (successors, key=lambda k: successors[k]) print (hex (max_successors_addr)) return successors_block[max_successors_addr] def get_real_blocks1 (blocks, main_dispatcher_block ): real_blocks = [] for block in blocks: if (main_dispatcher_block.start_ea == block.start_ea): continue succ_addrs = [] succ_blocks = list (block.succs()) for succ_block in succ_blocks: succ_addrs.append(succ_block.start_ea) if (main_dispatcher_block.start_ea in succ_addrs): REAL_BLOCKS[block.start_ea] = BLOCK(block, block.start_ea) real_blocks.append(block) return real_blocks def print_real_blocks (blocks ): print ("---real_blocks---" ) for block in blocks: print (f" {block.start_ea:x} " ) print ("---end---\n" ) def find_all_real_block (func_ea ): real_blocks = [] blocks = idaapi.FlowChart(idaapi.get_func(func_ea)) main_dispatch_block = blocks[1 ] jmp_block = get_jmp_block(blocks) print (f"jmp_block => {jmp_block.start_ea:x} " ) real_blocks = get_real_blocks1(blocks, jmp_block) print_real_blocks(real_blocks) dispatcher_blocks = [] for i in blocks: if (i.start_ea not in list (REAL_BLOCKS.keys()) and i.start_ea not in ret_blocks and i.start_ea != head_blocks and i.start_ea != jmp_block.start_ea and i.start_ea != main_dispatch_block.start_ea): dispatcher_blocks.append(i) return real_blocks, dispatcher_blocks import structdef calculate_branch_offset (current_pc, target_address ): """ 计算 ARM64 跳转指令的偏移量。 :param current_pc: 当前指令的地址 :param target_address: 跳转目标地址 :return: 偏移量,单位为 4 字节 """ offset = (target_address - current_pc) // 4 if offset < -0x2000000 or offset > 0x1FFFFFFF : raise ValueError("偏移量超出范围,无法表示" ) return offset def generate_branch_instruction (current_pc, target_address ): """ 根据当前地址和目标地址生成 ARM64 跳转指令的机器码。 :param current_pc: 当前指令的地址 :param target_address: 跳转目标地址 :return: 机器码(以字节表示) """ offset = calculate_branch_offset(current_pc, target_address) instruction = 0x14000000 instruction |= (offset & 0x03FFFFFF ) machine_code = struct.pack("<I" , instruction) return machine_code def patch_jmp (block, addr ): end_addr = block.end_ea - 4 print (f"{block.start_ea:x} {end_addr:x} => {addr:x} " ) code = generate_branch_instruction(end_addr, addr) ida_bytes.patch_bytes(end_addr, code) print (code) def patch_all (real_blocks, dispatcher_blocks ): for real_block in real_blocks: jmp_addr = random.choice(dispatcher_blocks).start_ea patch_jmp(real_block, jmp_addr) head_blocks = 0x000000000001E51C ret_blocks = [0x214F8 , 0x215B0 , 0x215B4 , 0x21F50 ] real_blocks, dispatcher_blocks = find_all_real_block(head_blocks) patch_all(real_blocks, dispatcher_blocks)
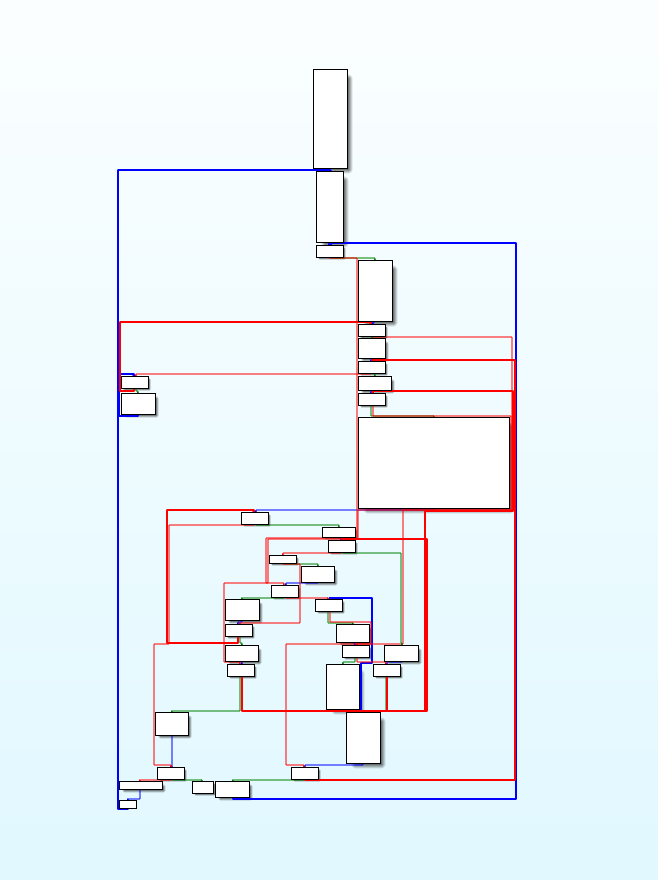
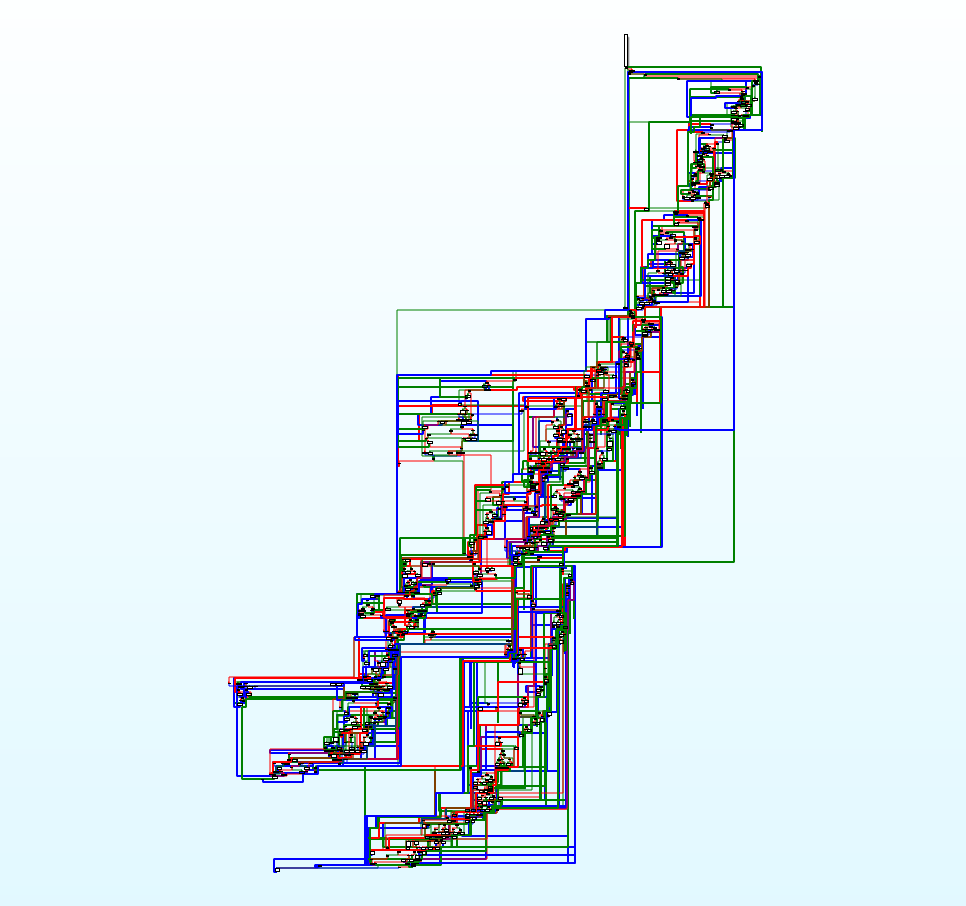
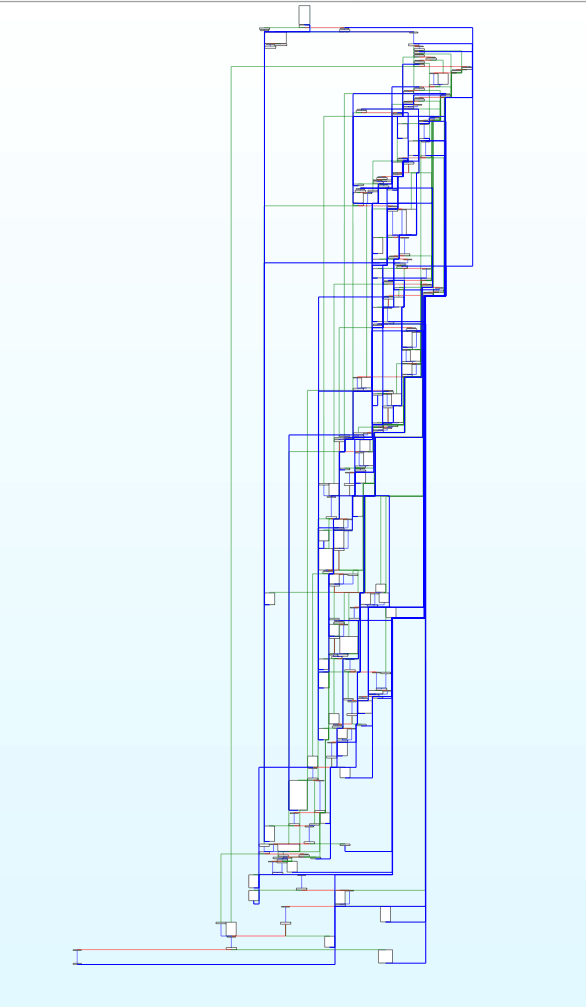
可以看到已经生成了更难看的cfg
问题 虽然修改成功,但实际上修改后的程序跑出来的结果是不对的,直接死循环
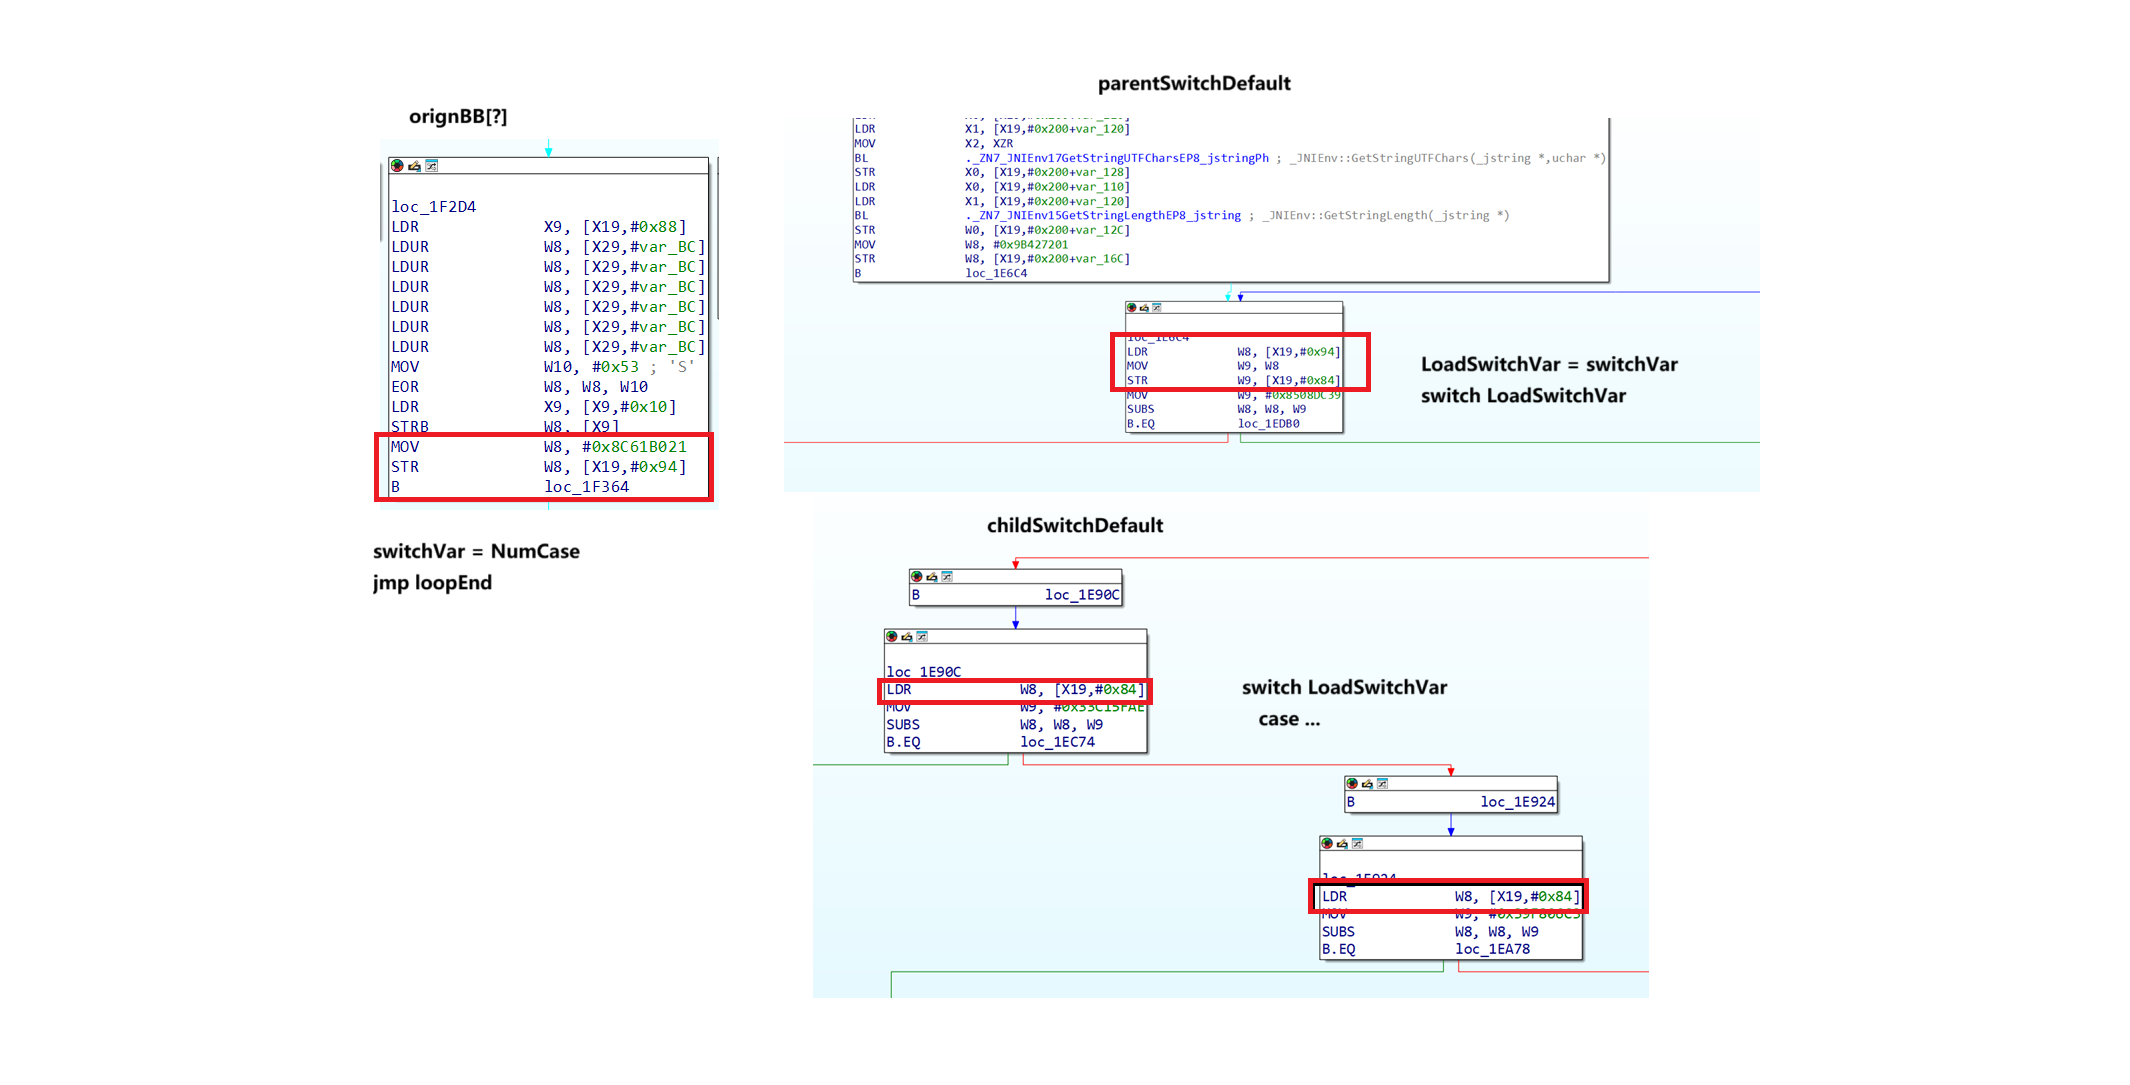
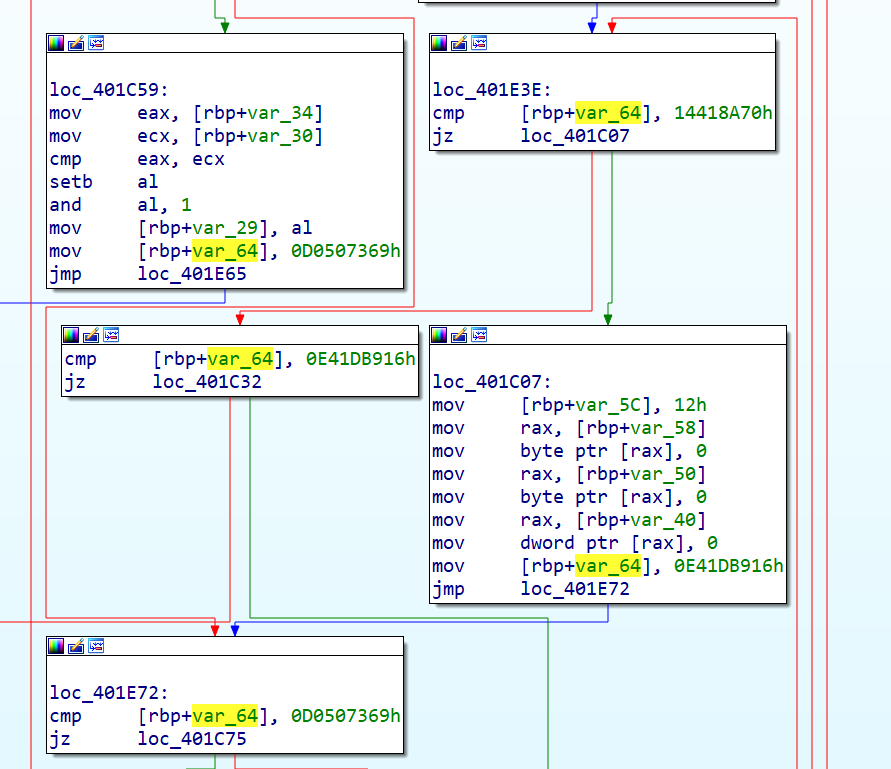
我们再看回这张图,可以看到再每个origBB的末尾,将numCase赋值到的是switchVar
但在childSwDefault块中,进行判断的是loadSwitchVar值
将switchVar赋值给loadSwitchVar的操作只在parentSwDefault出现
而如果origBB直接跳转到childSwDefault块中,造成的结果将是值永远不变,因此可能会不断地进入一个origBB块造成死循环。
解决思路 那么解决方案就有几种
将每个childSwDefault块都修改为判断switchVar的值
在每个childSwDefault块中都添加loadSwitchVar = switchVar的指令
OLLVM源码修改 有了大概的思路后,我们就可以尝试开始对源码进行修改
尝试1 (失败) 先尝试将switch的判断值改为switchVar
查看关键源码
1 2 3 4 5 6 7 8 9 10 11 12 13 14 15 16 17 18 19 switchVar = new AllocaInst (Type::getInt32Ty (f->getContext ()), 0 , "switchVar" , insert); new StoreInst ( ConstantInt::get (Type::getInt32Ty (f->getContext ()), llvm::cryptoutils->scramble32 (0 , scrambling_key)), switchVar, insert); ''' load = new LoadInst (switchVar->getType ()->getElementType (), switchVar, "switchVar" , loopEntry); ''' switchI = SwitchInst::Create (&*f->begin (), swDefault, 0 , loopEntry); switchI->setCondition (load);
我们直接修改为
1 2 3 4 5 6 7 8 9 10 11 12 13 14 15 16 17 18 19 switchVar = new AllocaInst (Type::getInt32Ty (f->getContext ()), 0 , "switchVar" , insert); new StoreInst ( ConstantInt::get (Type::getInt32Ty (f->getContext ()), llvm::cryptoutils->scramble32 (0 , scrambling_key)), switchVar, insert); ''' ''' switchI = SwitchInst::Create (&*f->begin (), swDefault, 0 , loopEntry); switchI->setCondition (switchVar);
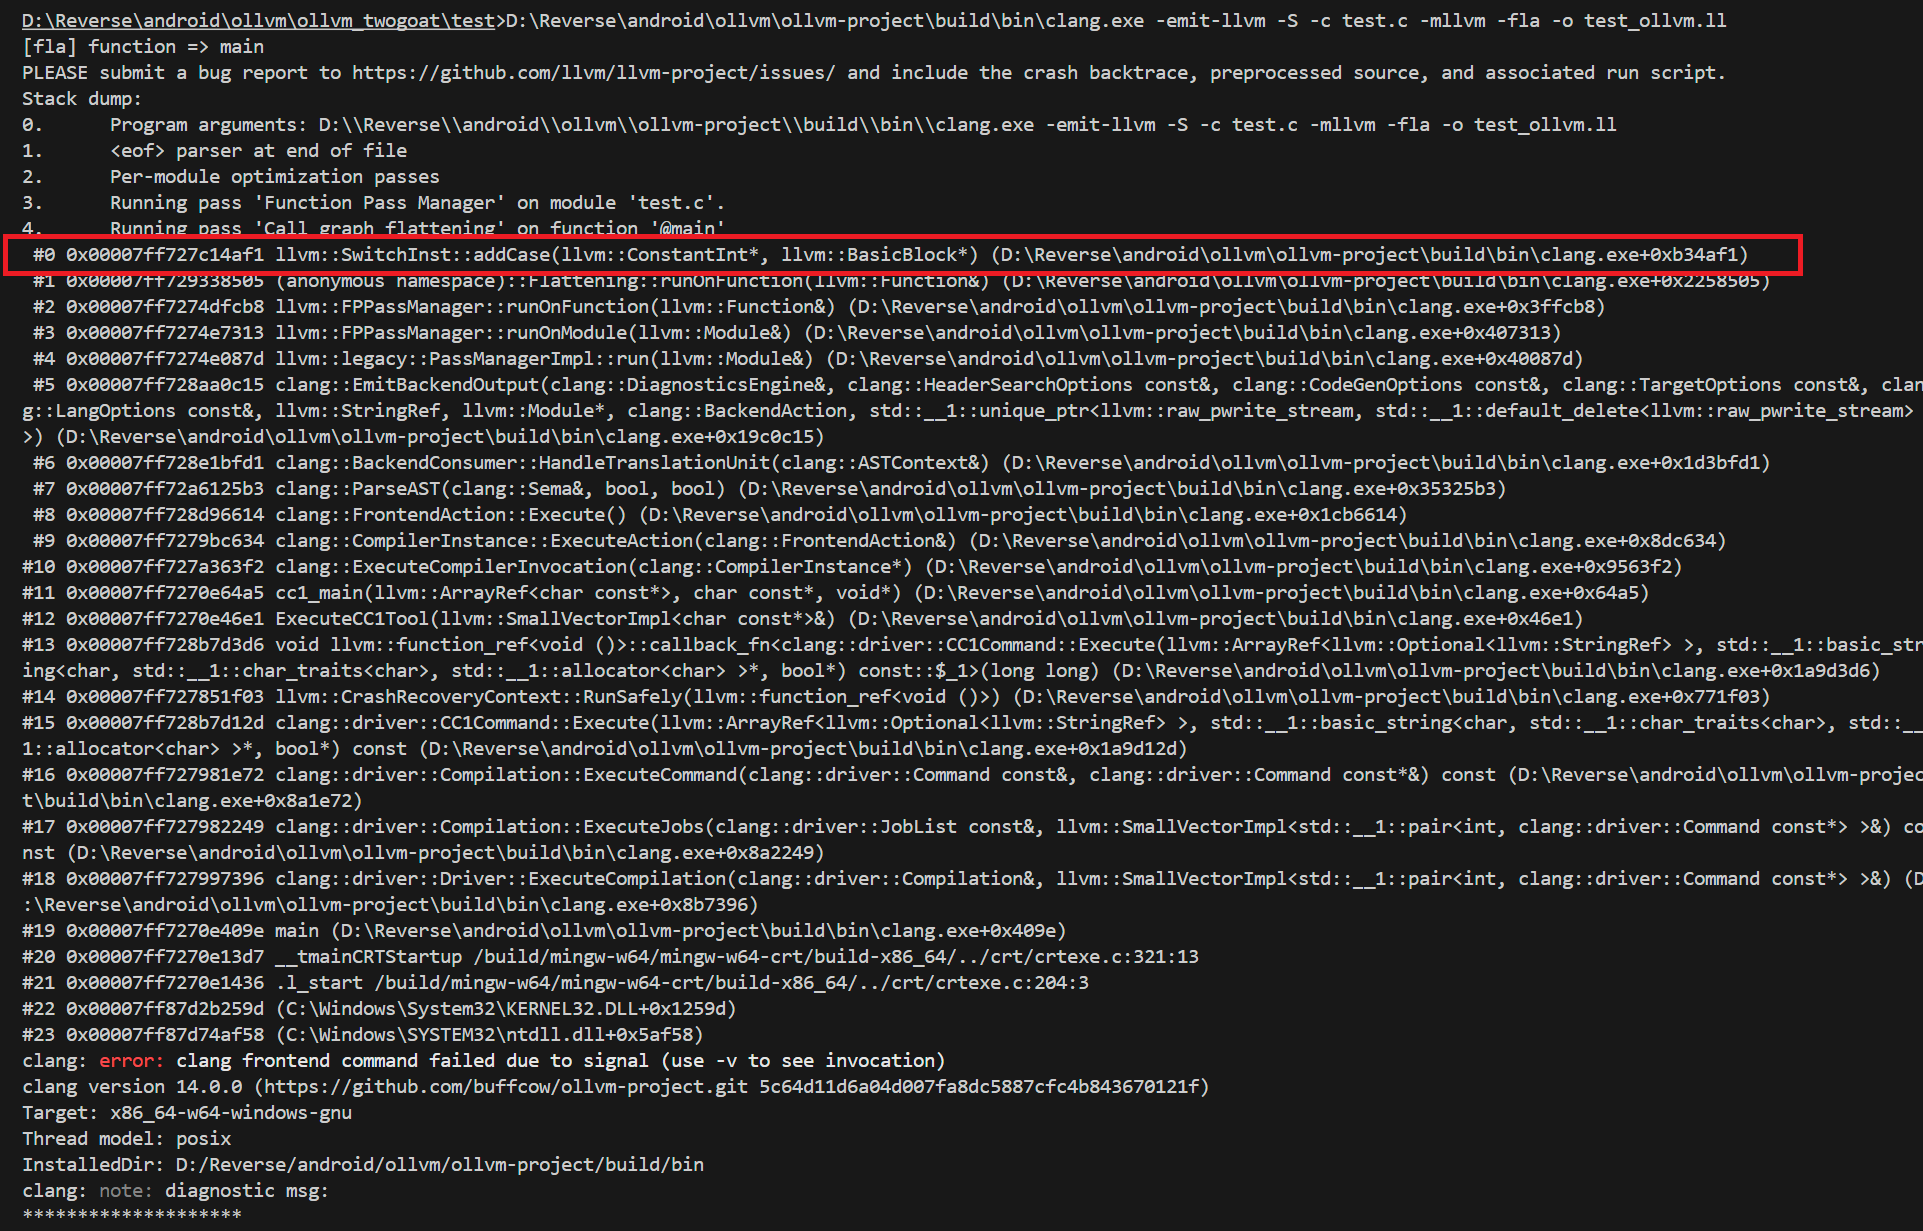
好好,编译运行一波试试,诶诶,怎么出问题了
试了几次,发现必须要添加了loadSwitchVar = switchVar的操作后,才能做到不报错
SwitchInst::setCondition()传入的参数类型应该为Value
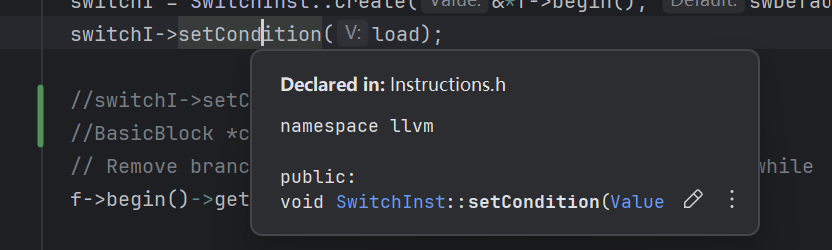
最后查看一波IR发现
这里大概是因为switchVar实质是一个指针,所以必须要先进行一个load的操作,而这样又不可避免地在IR中会产生一个新变量
那我们后面就干脆试一试每个case都加上一个load操作了
尝试2 (成功) 通过上面的尝试,我们发现无法直接在switch的结构中直接对switchVar进行判断,而这里又会引出一个新问题
新问题 在源码中,每个origBB的结尾会进行这样一个操作
1
2
3
4
5
6
7
8
for (std::vector<BasicBlock *>::iterator b = origBB.begin (); b != origBB.end (); ++b) { BasicBlock *i = *b; ''' BranchInst::Create (loopEnd, i); }
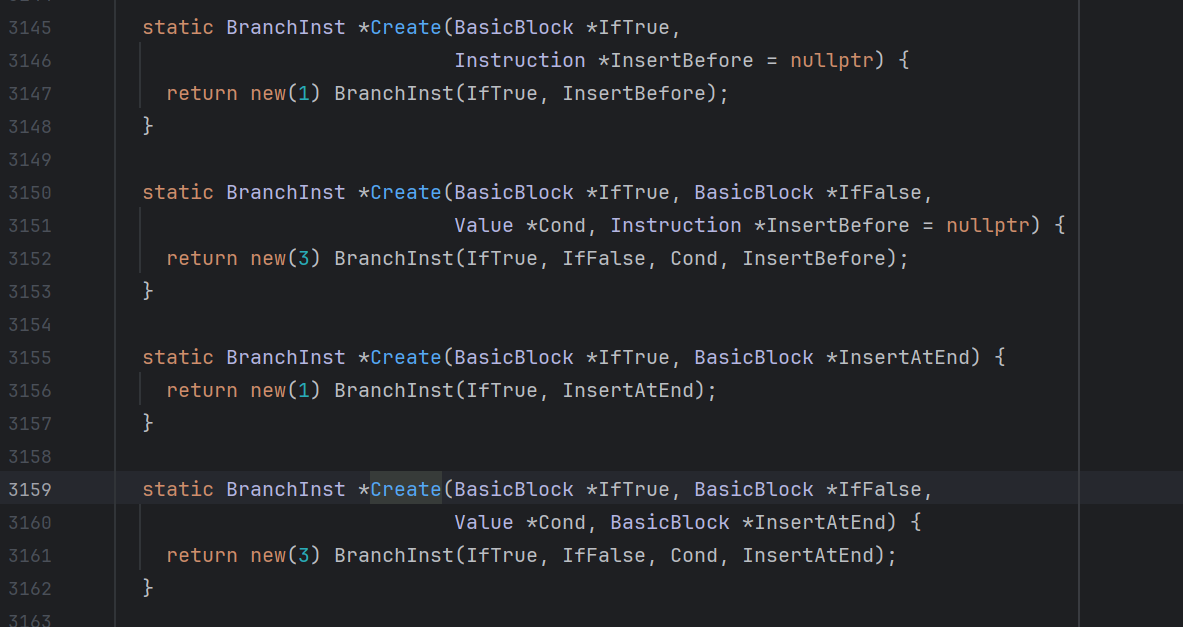
在llvm-pass中,该建立跳转的指令为BranchInst::Create,他的含义为,创建一条从InsertAtEnd跳转到IfTrue块的指令
1 static BranchInst *Create (BasicBlock *IfTrue, BasicBlock *InsertAtEnd)
而对于他的所有重载,操作的单位都只能是BasicBlock类型
而一个switchI的类型为SwitchInst,每种case无法被拆为BasicBlock,这样是没有办法跳转过去的
解决思路 既然switch结构的问题这么多,那么我们为什么不改用简单的if判断结构?
1 2 3 4 5 6 7 8 9 10 11 12 13 14 15 16 17 18 19 20 21 22 23 24 25 26 27 28 29 30 31 32 33 34 35 36 37 std::vector<BasicBlock *> cmpDefaultList; for (int i = 0 ; i < origBB.size (); i++) { cmpDefaultList.push_back (BasicBlock::Create (f->getContext (), "cmpDefault" , f, nullptr )); } int count = 0 ;for (std::vector<BasicBlock *>::iterator b = origBB.begin (); b != origBB.end (); ++b) { BasicBlock *i = *b; ConstantInt *numCase = NULL ; i->moveBefore (loopEnd); numCase = cast <ConstantInt>(ConstantInt::get ( switchI->getCondition ()->getType (), llvm::cryptoutils->scramble32 (switchI->getNumCases (), scrambling_key))); switchI->addCase (numCase, i); load = new LoadInst (switchVar->getType ()->getElementType (), switchVar, "switchVar" , cmpDefaultList[count]); CmpInst* cmpI = CmpInst::Create (Instruction::ICmp, CmpInst::ICMP_EQ, load, numCase, "CmpInst" , cmpDefaultList[count]); if (count < origBB.size () - 1 ) { BranchInst::Create (i, cmpDefaultList[count + 1 ], cmpI, cmpDefaultList[count]); } else { BranchInst::Create (i, loopEnd, cmpI, cmpDefaultList[count]); } count++; }
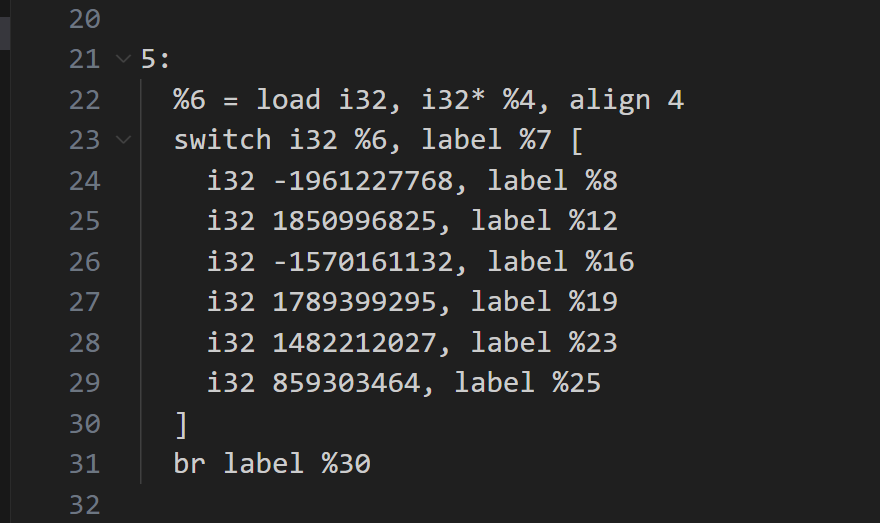
生成一波IR看看
这是原本的Switch结构,为一个大Block
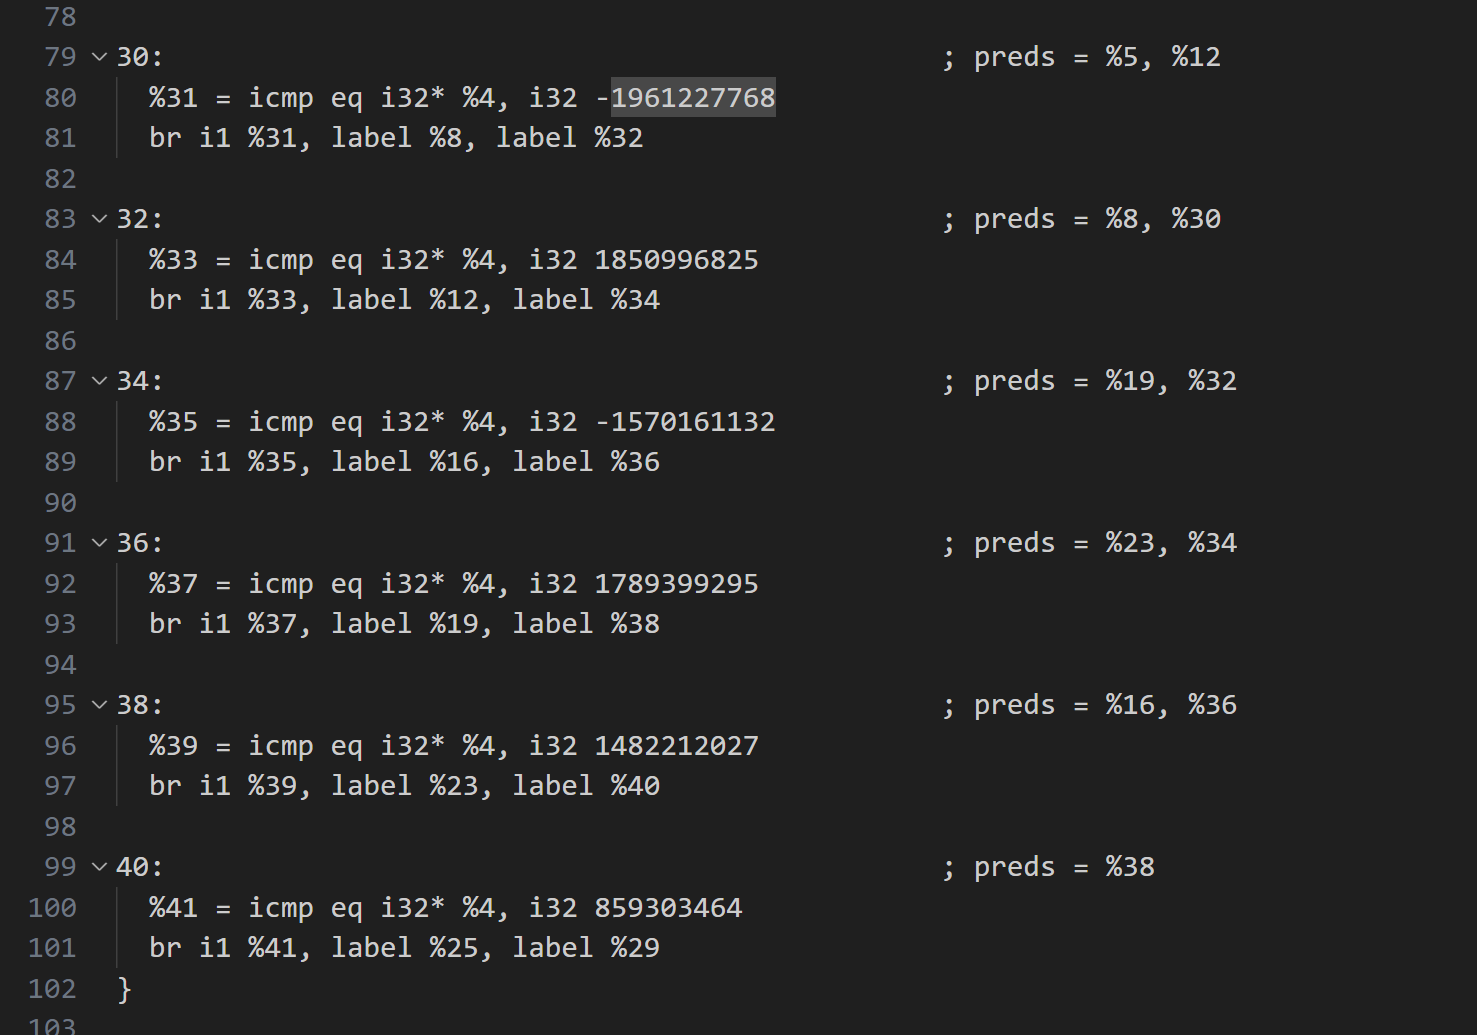
这是我们新添加的if块
那么接下来就是令每个origBB的随机跳转到进去
1
2
3
4
5
6
7
8
9
10
11
12
13
14
15
16
17
18
19
20
21
22
23
24
25
26
27
28
29
30
31
32
33
34
35
count = 0; std::vector<int> randomArray = generateRandomArray(origBB.size() - 1); // Recalculate switchVar for (std::vector<BasicBlock *>::iterator b = origBB.begin(); b != origBB.end(); ++b) { BasicBlock *i = *b; ConstantInt *numCase = NULL; // Ret BB if (i->getTerminator()->getNumSuccessors() == 0) { continue; } // If it's a non-conditional jump if (i->getTerminator()->getNumSuccessors() == 1) { // Get successor and delete terminator ''' BranchInst::Create(cmpDefaultList[randomArray[count]], i); count++; continue; } // If it's a conditional jump if (i->getTerminator()->getNumSuccessors() == 2) { // Get next cases ''' BranchInst::Create(cmpDefaultList[randomArray[count]], i); count++; continue; } }
最后将switch块从loopEntry后移除,改为我们的if块
1
2
switchI->eraseFromParent(); BranchInst::Create(cmpDefaultList[0], loopEntry);
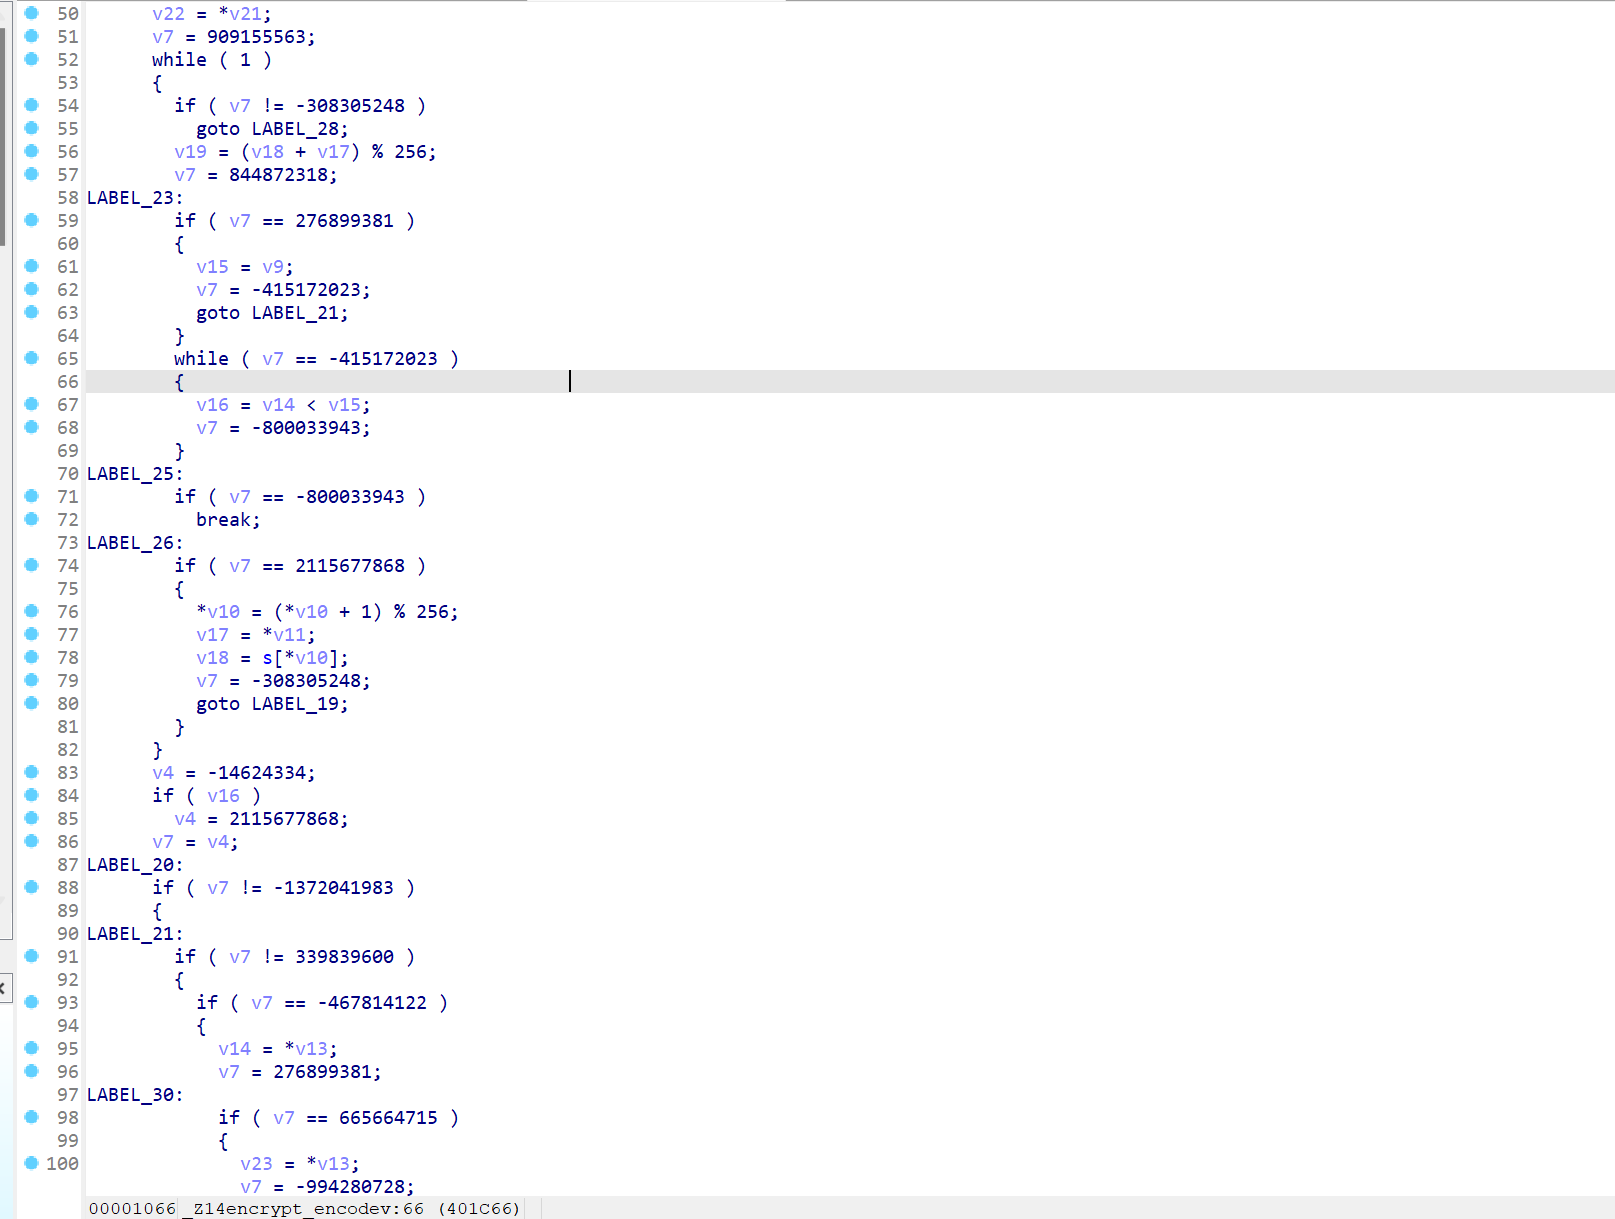
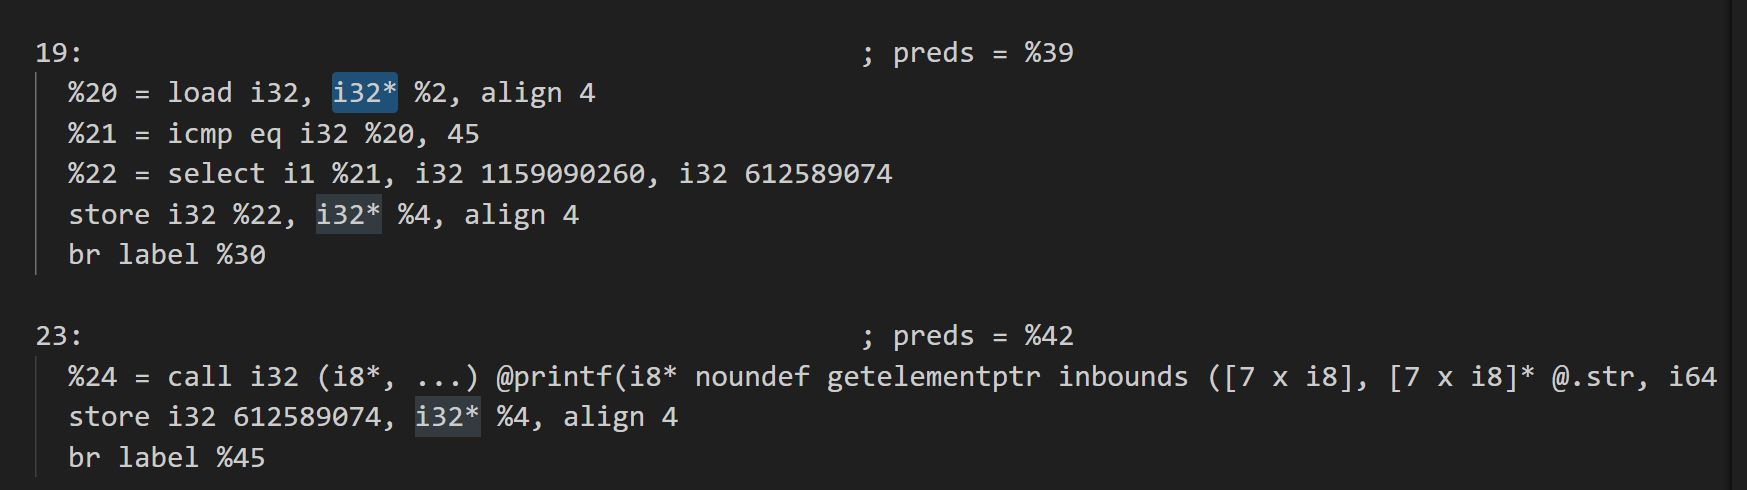
编译成功,可以看到其实编译器最后会帮我们进行优化,现在是直接对switchVar进行判断了
最终代码 完整的项目贴在github仓库
twogoat/ollvm-project at 14.x_modified1
总结 通过对真实块的后继的修改,实现了ollvm的简单魔改,可以令d810无法生效
通过这次的尝试也对ollvm-fla原理,llvm-pass的操作有了进一步的了解
接下来还会尝试更多的魔改方案